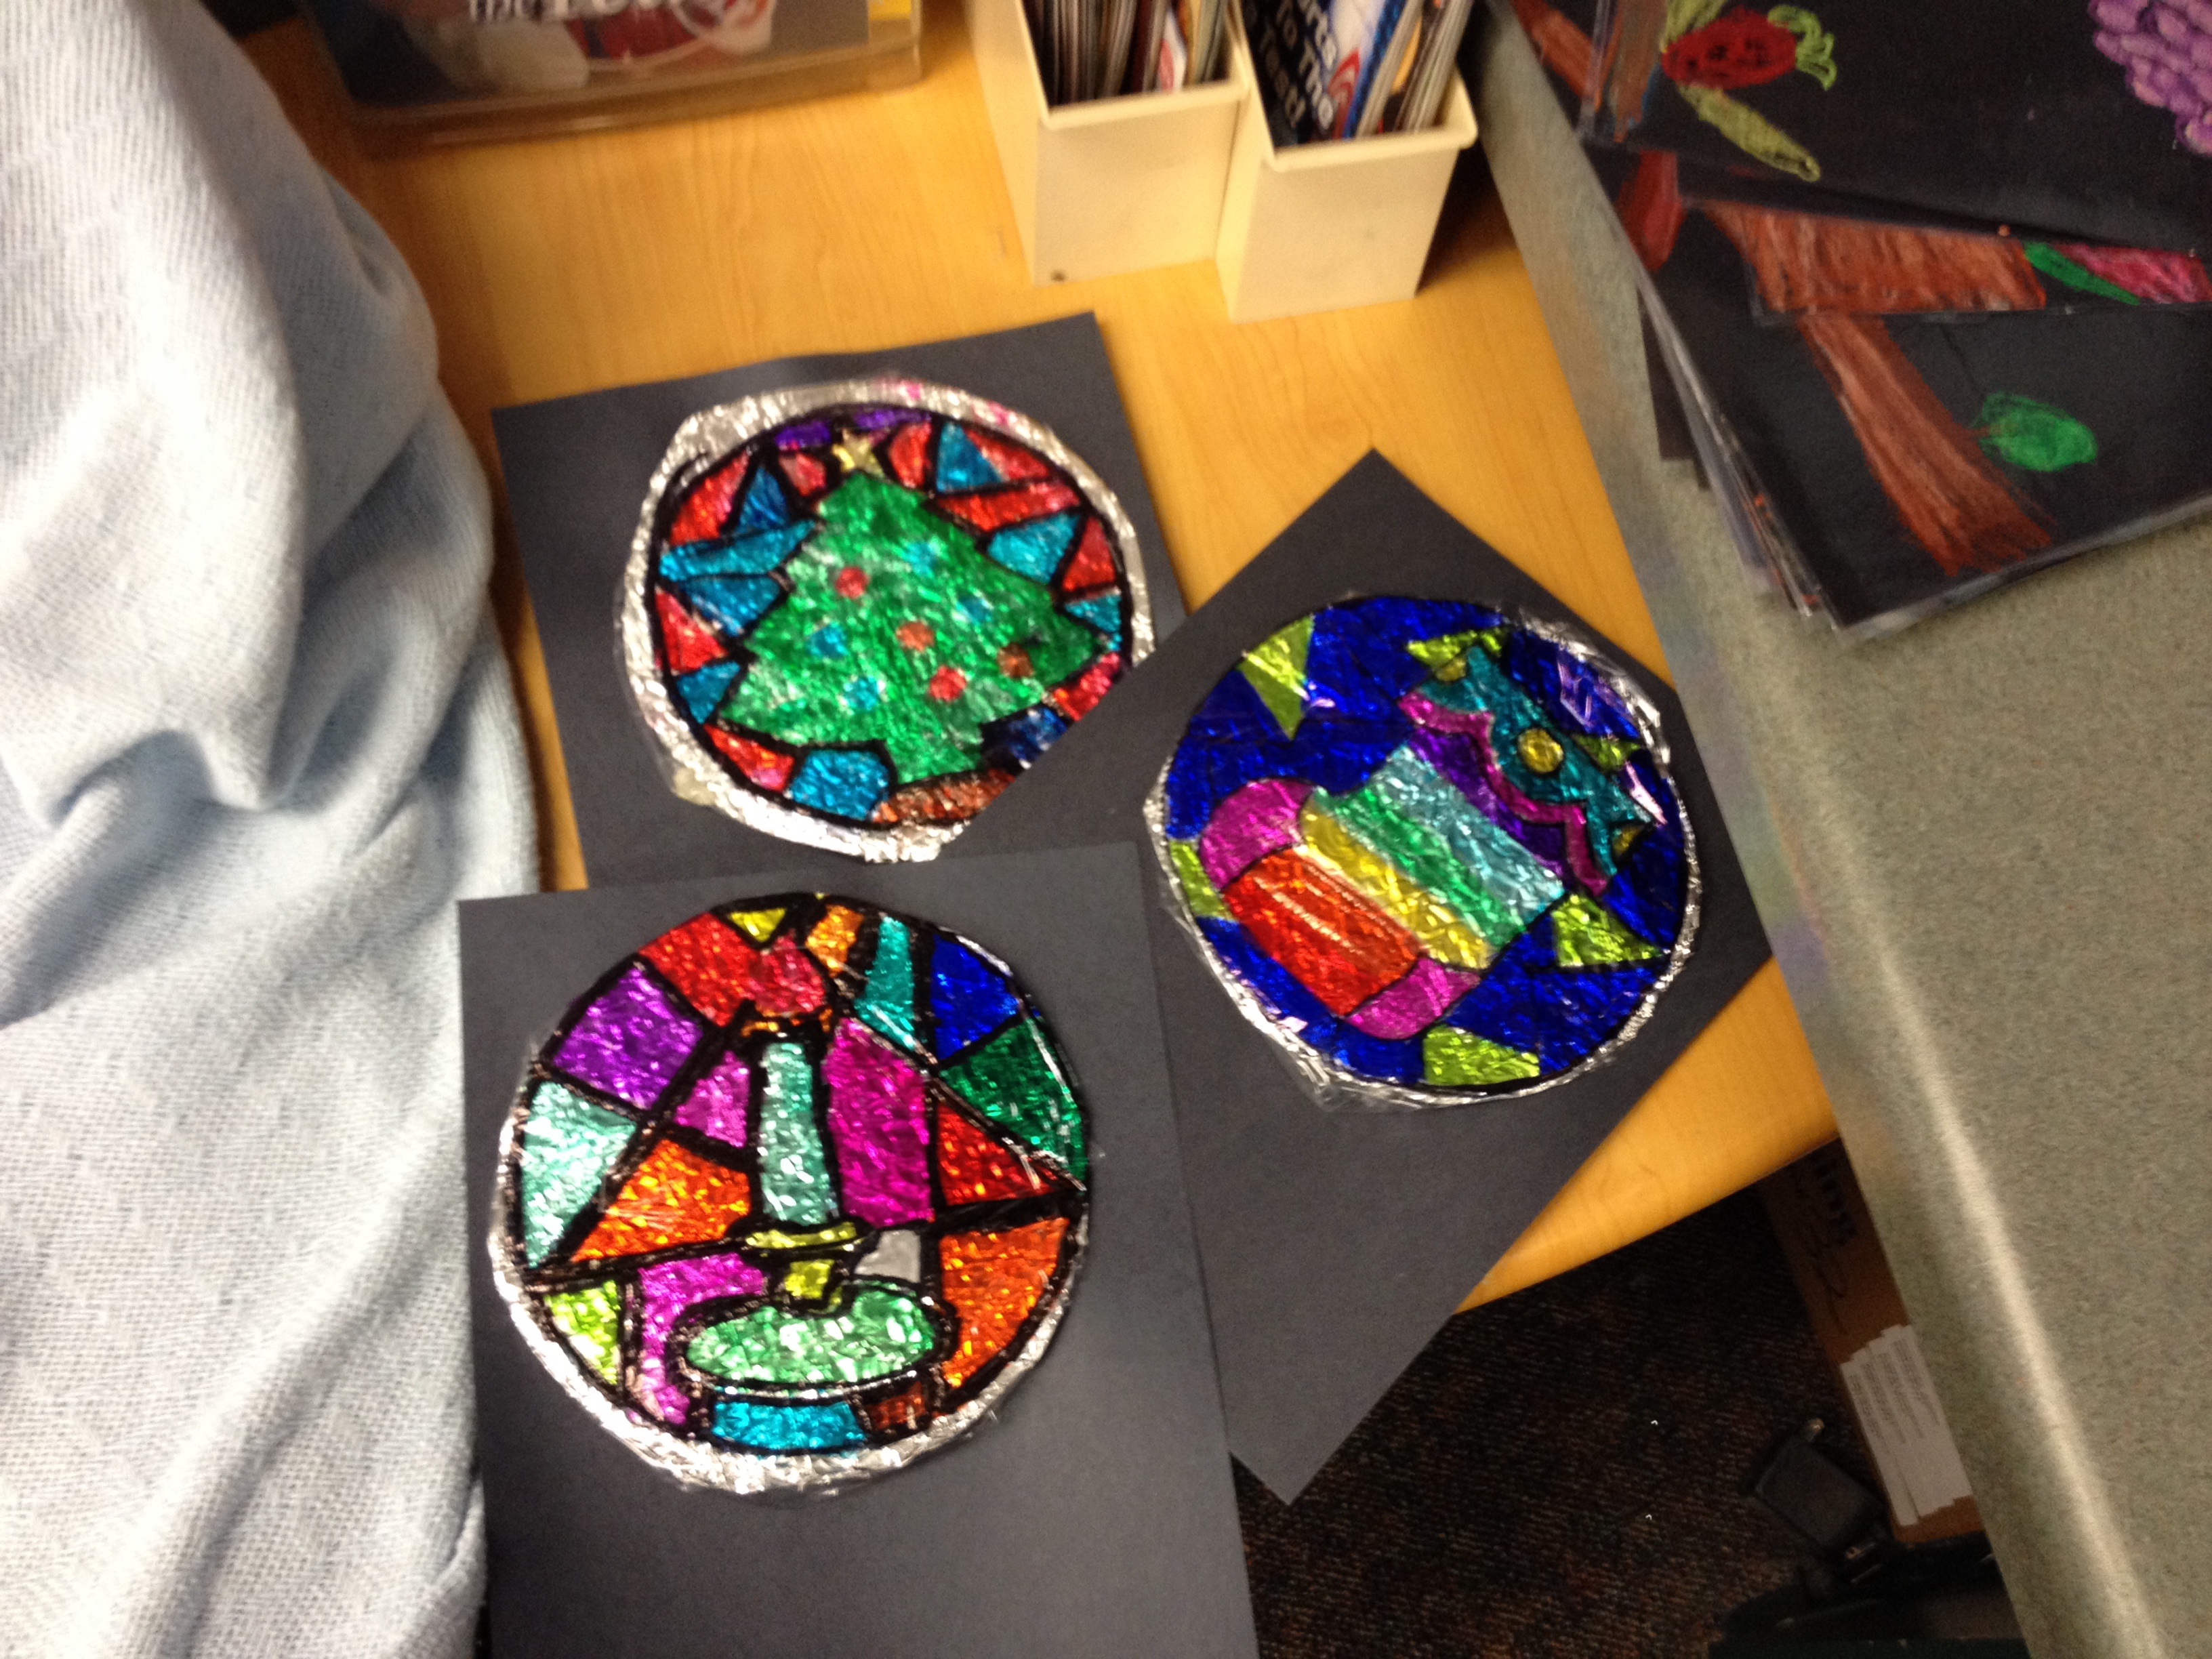
When I was teaching first grade, a very amazing teacher introduced me to this craft and I’ve done it every year since. The results are always the same. The artwork looks great and the kids LOVE doing it, regardless of their age. We usually do this during the holiday season, so that is why the pictures you will see are Christmas-y. You could run copies of any stained glass design to fit your needs. I just like my Christmas pics.
Ideally, I try to pair this assignment with an informational text article explaining stained glass windows, i.e. the history of it, the technique, most renowned pieces, etc. I also have a short poem titled “Stained Glass” that the students memorize for an oral presentation. Now, notice I said ideally….this year, I simply ran out of time. I ended up completing this activity during our holiday party. It actually worked out well, but it was purely for the fun of it–no text needed.
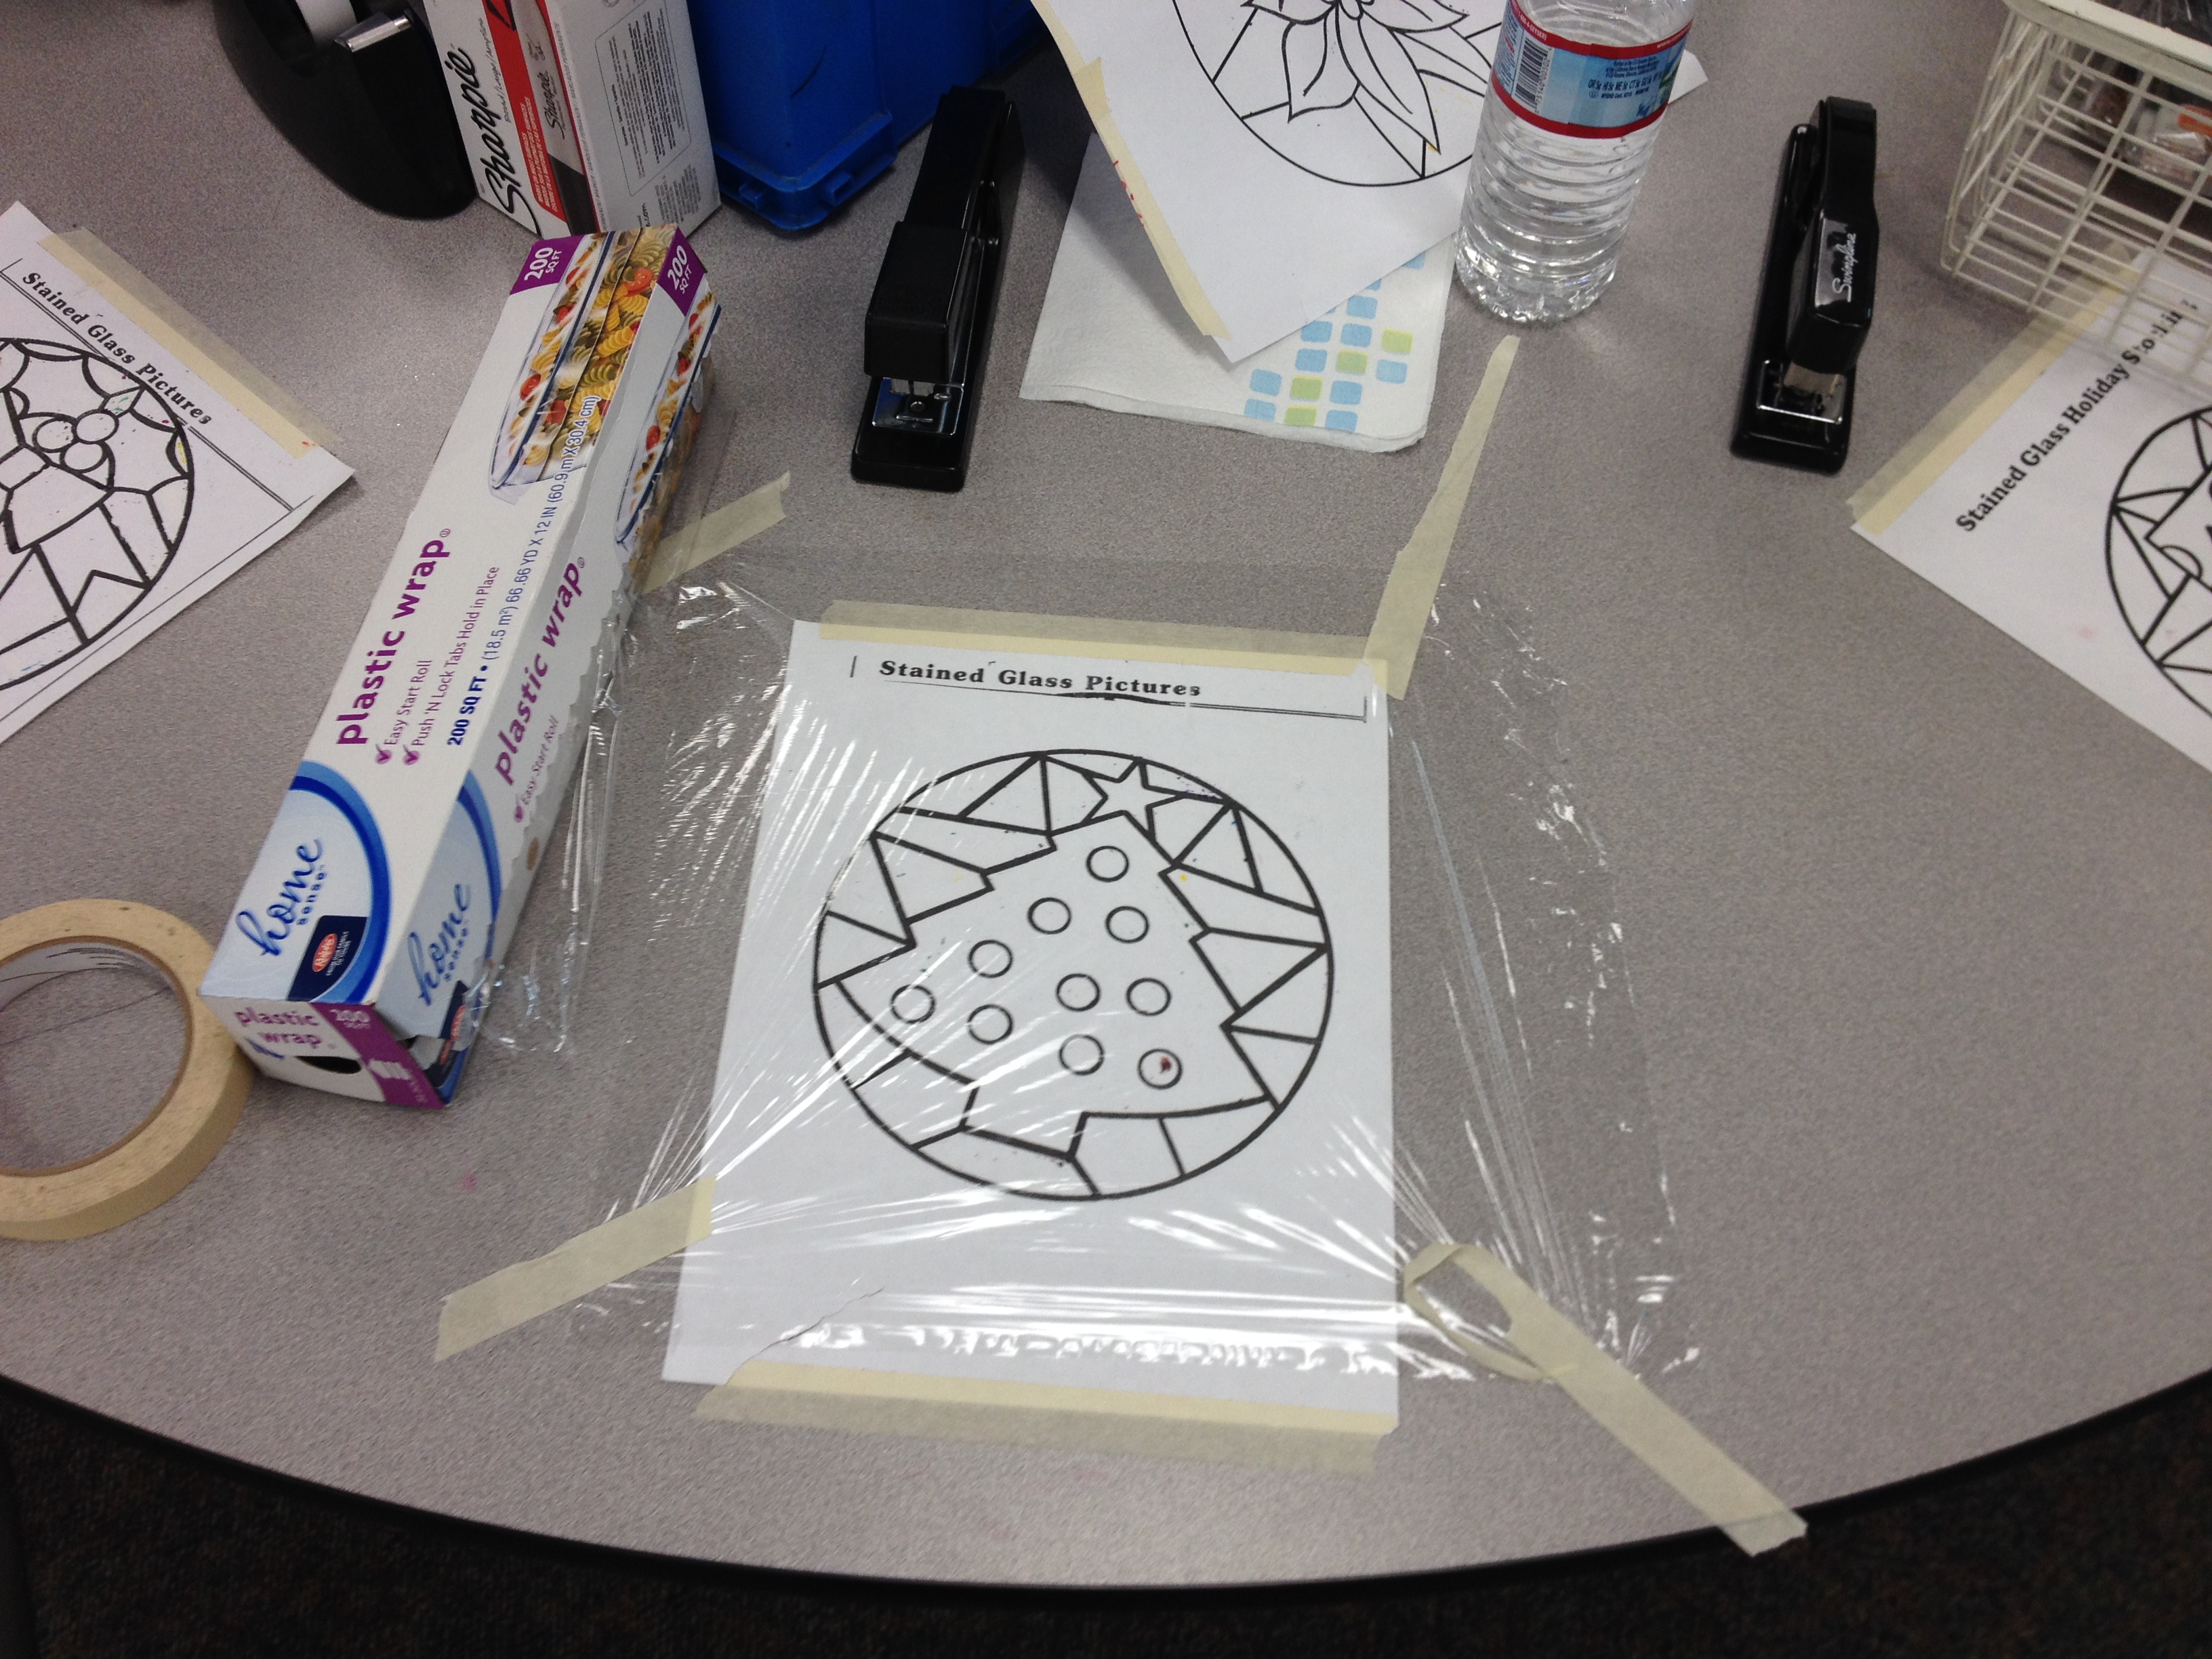
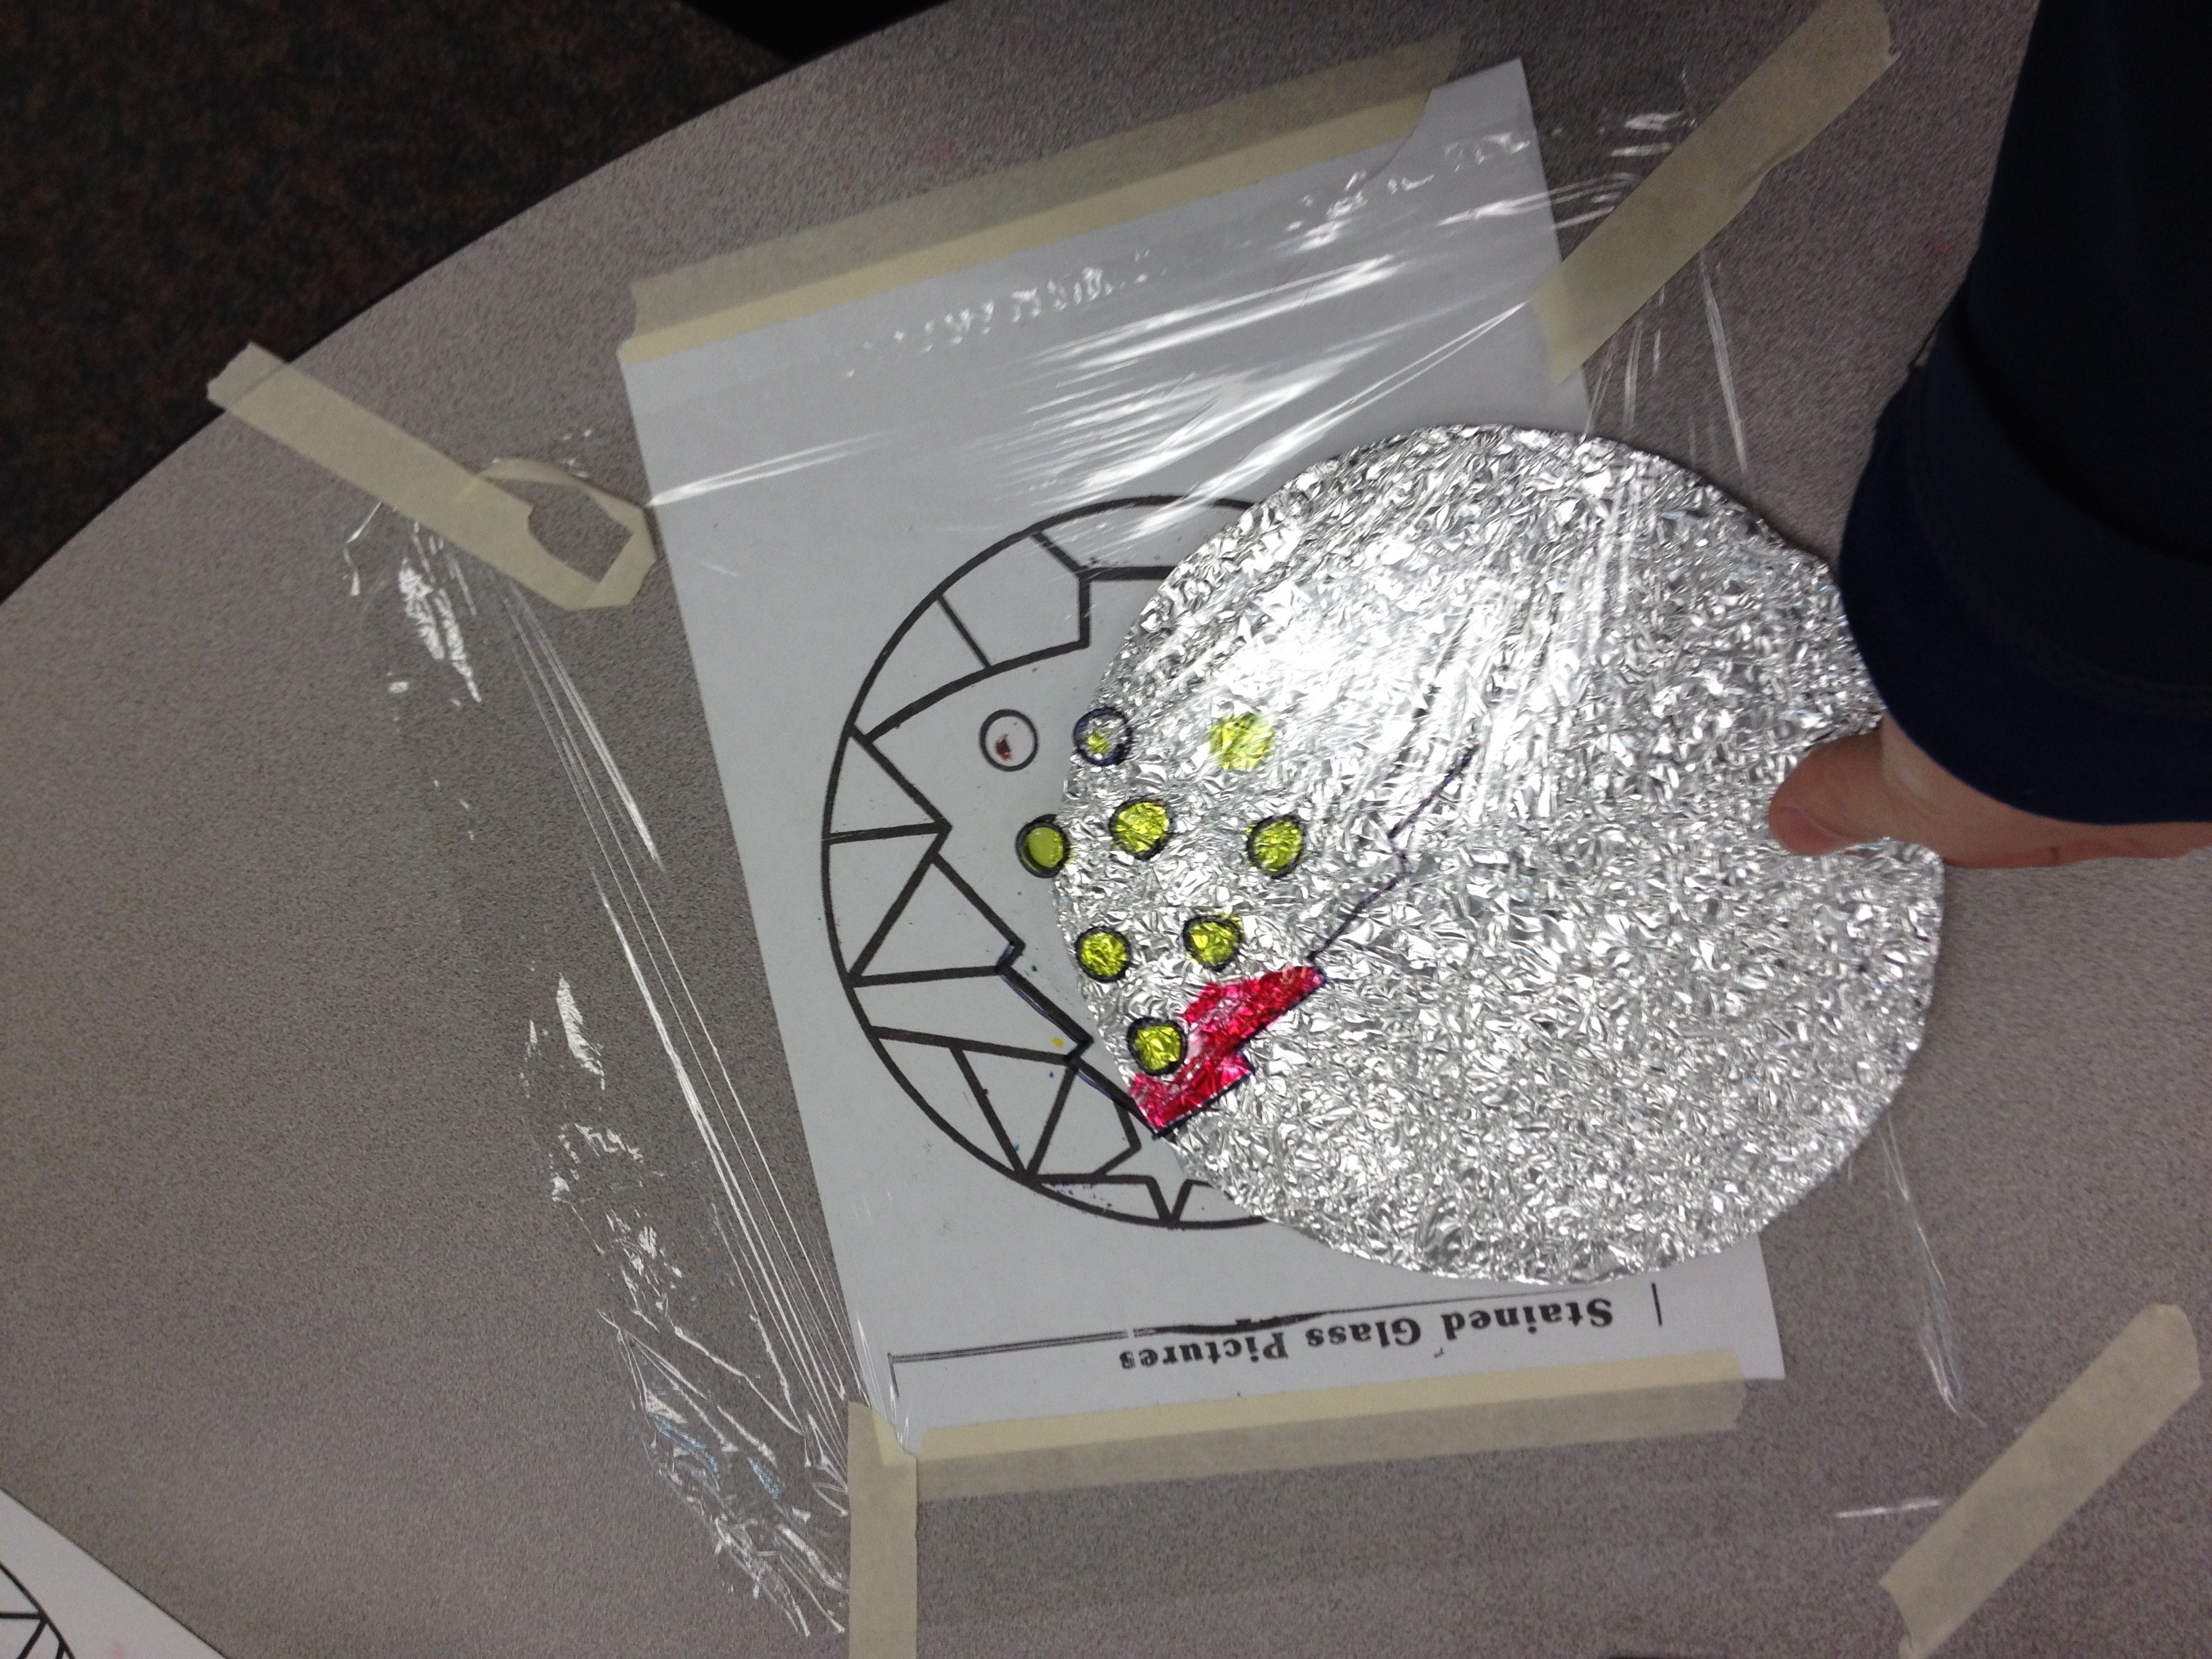
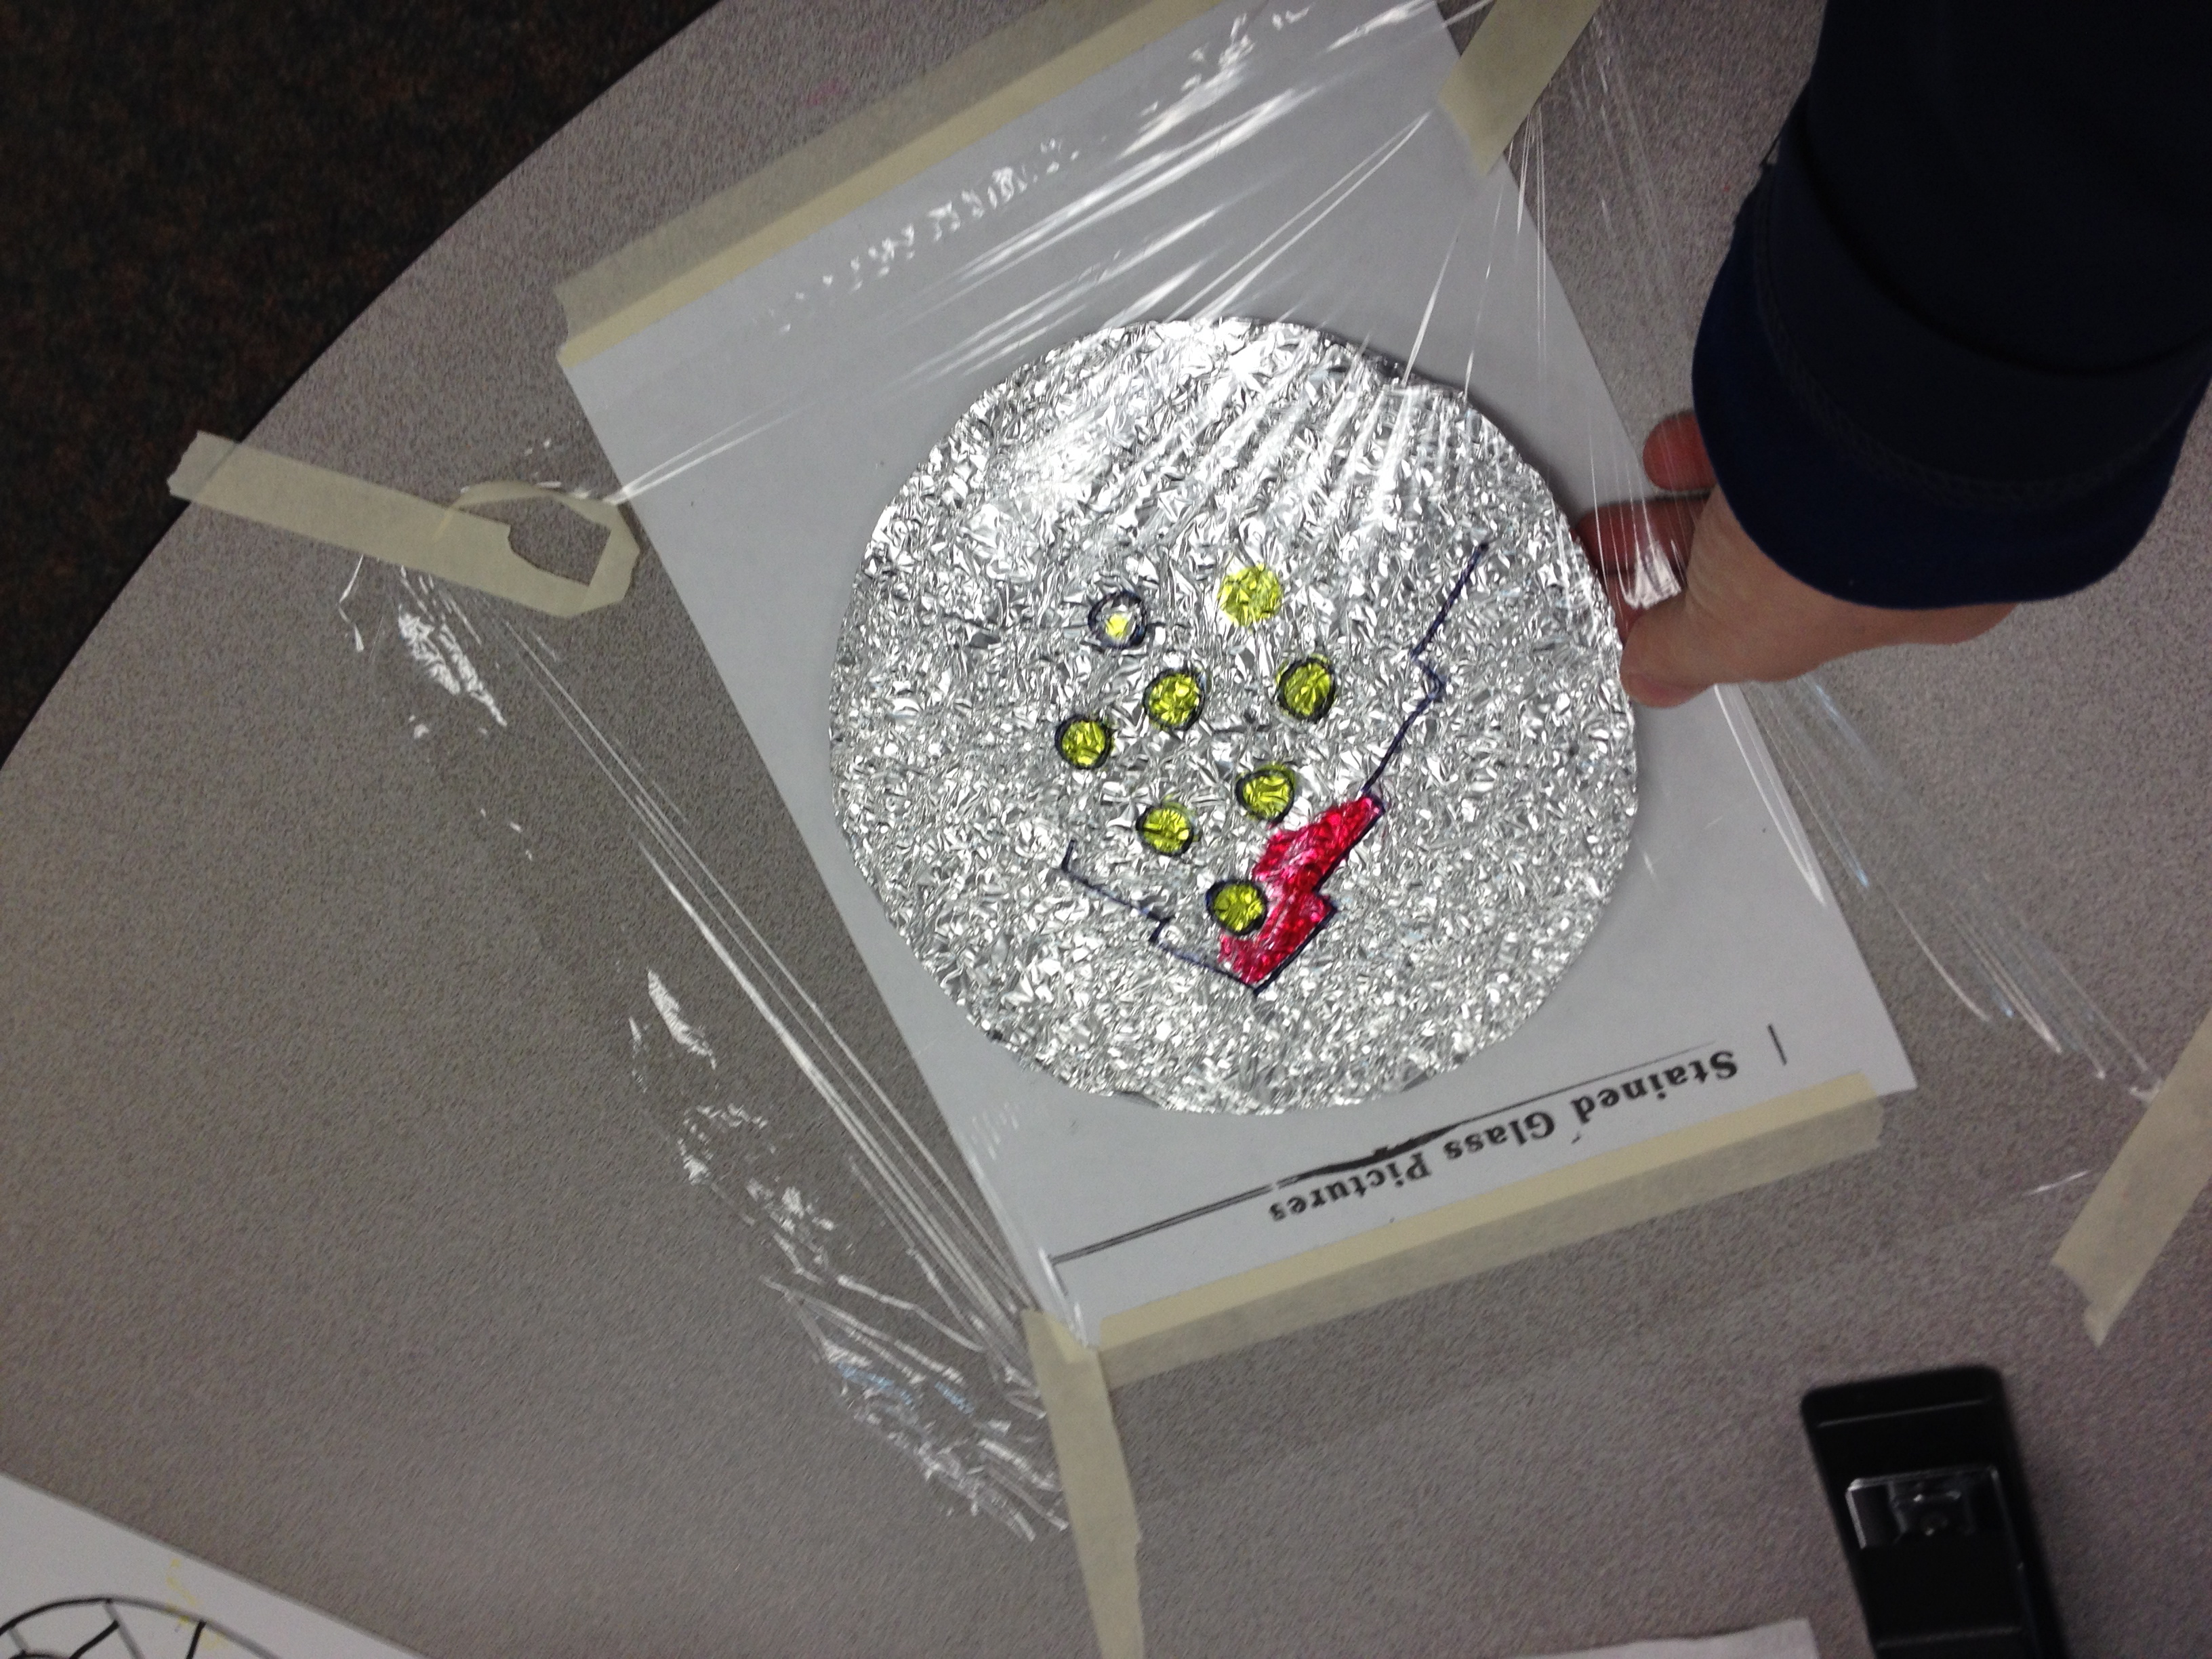
First, create a circular template to fit your stained glass design. Trace circles onto a file folder to cut out. Do not use regular paper–too flimsy!Tape your templates on your work space. These will remain for each student rotation. Only the clear wrap gets moved.Cover the picture with clear plastic wrap. This is what the students will be coloring on.Tape clear plastic wrap tightly and securely over each picture. Make sure the students don’t move it around.Sharpies and Marks-a-lot markers work the best! They must be permanent.Color gently and make sure every spot gets colored well.After the picture is completely colored, the students MUST outline ALL the lines of picture in BLACK marker. This is what makes it pop!Carefully slide the file folder that you wrapped with aluminum foil under the finished picture.*Important- to wrap the file folder in foil, you must first crumble it into a ball and then gently unwrap it. Be careful because it tears easily. This is what gives the window the desired look.
Literacy instructional coach turned site administrator. Misser of the classroom. Reader. Wannabe writer. Barely blogger. Podcaster. Dormant Poet...I just know it.
View more posts